In the modern era of cloud computing and distributed systems, securing remote access to critical infrastructure and applications has become a paramount concern for organizations worldwide. As teams become more geographically dispersed, the need for a secure, scalable, and user-friendly remote access solution has never been more critical. Enter HashiCorp Boundary — a revolutionary tool designed to redefine how organizations manage remote access to their systems.
Core Principles of HashiCorp Boundary
Boundary is built on the foundation of three core principles:
Security at the Forefront
Boundary is designed with a “security-first” mindset, ensuring that access to any system is securely authenticated and authorized. It leverages HashiCorp’s Vault for identity-based access, ensuring that users can only access resources for which they have explicit permissions.
Minimal Configuration, Maximum Flexibility
One of the hallmarks of Boundary is its ability to provide secure access with minimal configuration. Unlike traditional VPNs that require extensive network configuration and management, Boundary simplifies access to services, irrespective of their location — be it on-premises, in the cloud, or across multiple clouds.
DevOps and Automation Friendly
In keeping with HashiCorp’s ethos, Boundary is designed to be highly automation-friendly, fitting seamlessly into the CI/CD pipelines and infrastructure as code practices that DevOps teams cherish. This ensures that access controls can evolve as rapidly as the infrastructure they protect.
Key Features of HashiCorp Boundary
Identity-Based Access
Boundary integrates with existing identity providers (such as Okta, Active Directory, etc.) to leverage organizational identities, making user management and authentication a breeze. This ensures that users can authenticate with the credentials they already use within their organization.
Fine-Grained Authorization
With Boundary, administrators can define highly granular access policies, controlling not just who can access a system, but also what they can do with that access. This level of control is crucial for adhering to the principle of least privilege, a cornerstone of modern cybersecurity.
Dynamic Session Management
Boundary sessions are fully audited and can be dynamically managed by administrators. This means that in the event of an incident, access can be revoked in real-time, and session logs can be reviewed for forensic analysis.
Seamless User Experience
Despite its robust security features, Boundary is designed to be invisible to the end-user. Accessing a remote system via Boundary feels as seamless as if the user were on the local network, significantly reducing the friction typically associated with secure remote access solutions.
Boundary in Action
Boundary’s architecture consists of three main components:
- Control plane — made up of controllers
- Data plane — made up of workers
- Client — installed on the user’s device
Controllers are what users authenticate to using the client, they contain Boundary’s resources and permissions. In addition, controllers also communicate with external components such as the database, KMS, Vault, identity providers, and plugins.
Workers are primarily used as network proxies for Boundary sessions, they allow you to access private targets. Instead of exposing a private network to the public, or allowing users to have access to entire private networks, workers create a direct network tunnel between users and targets.
Below is a quick glimpse of how HCP Boundary could be used to securely access resources/targets in a typical Hub and Spoke network methodology in Azure.
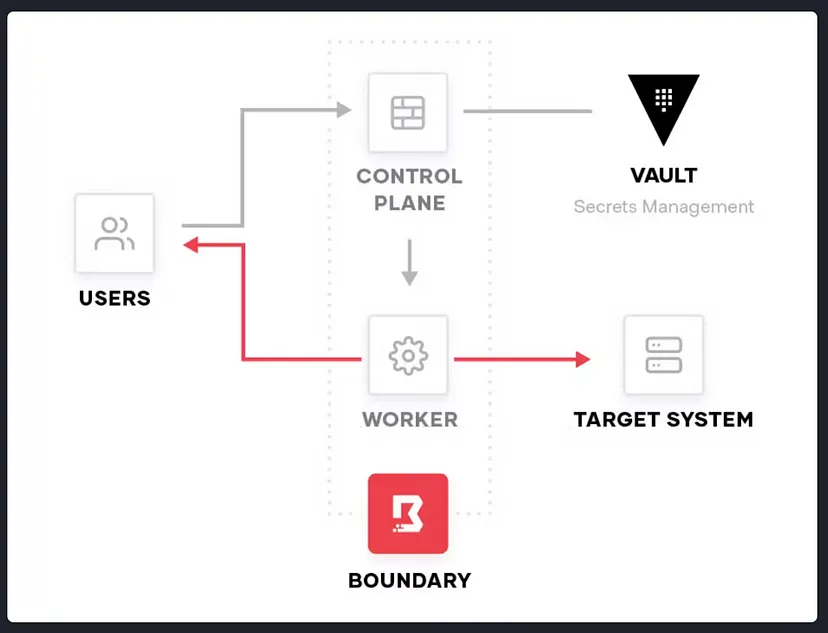
Target in our case is Azure Resource Sitting in Spoke in an Azure Hub and Spoke Model
Boundary integrates with Vault to broker Vault secrets to Boundary clients. Secrets are brokered using the command line or desktop clients to use Boundary sessions.
This feature enables Boundary as a credential broker for infrastructure targets by binding credentials with user sessions, and surfacing those credentials during session initialization. However in this for demonstration purpose I have gone with static credentials within HCP Boundary.
There are three options to get started with Boundary:
- HCP Boundary
- Boundary Enterprise
- Boundary Community Edition
Here I am having some fun with HCP Boundary.
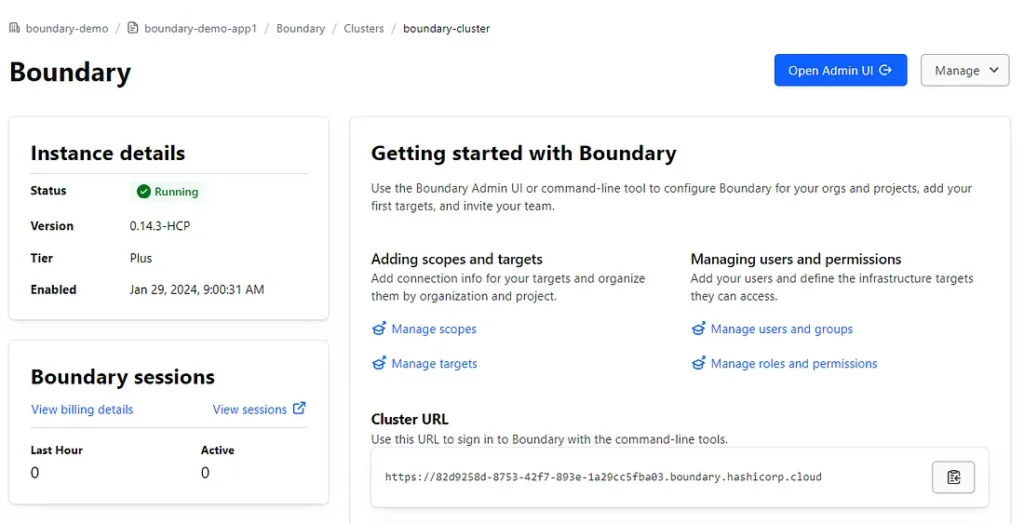
Step 1: Sign up for HashiCorp Cloud for free and create your boundary cluster.

Step 2: Connect to Cluster and use Admin UI to configure Boundary. I have already configured SSO so it will prompt me to sign in. You can follow HCP documentation on how to configure SSO with OIDC.
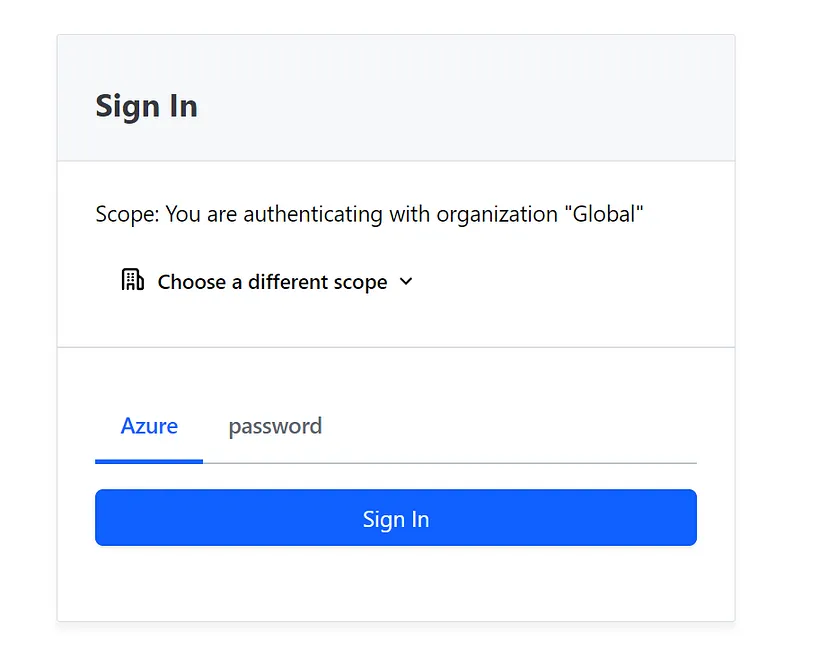
Step 3:- Create an org and setup Auth Method to SSO using MS Entra ID if you want to else you can carry on with password Auth method. I have already setup SSO and hence it prompts me to sign on to the Org.
Step 4: Go through the pretty common steps of creating the Org and then the Project. I have gone through and created an Org and a project for this demonstration.
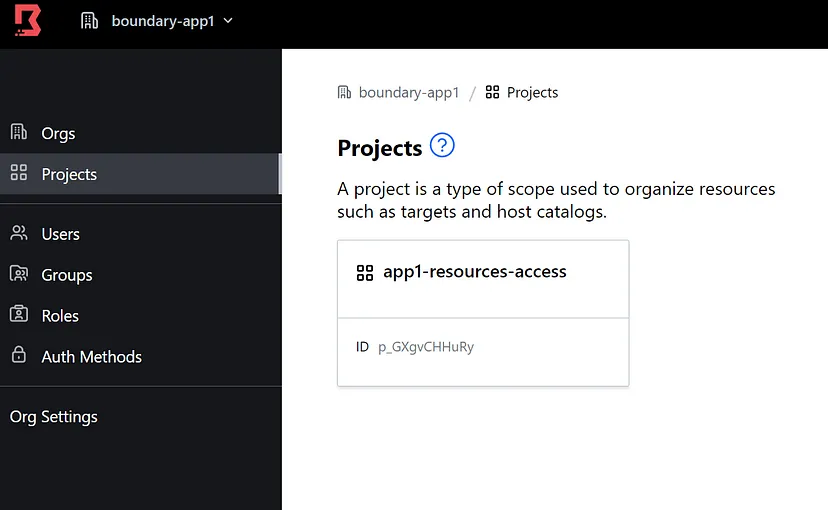
Snippet when I have an Org and Project within that Org
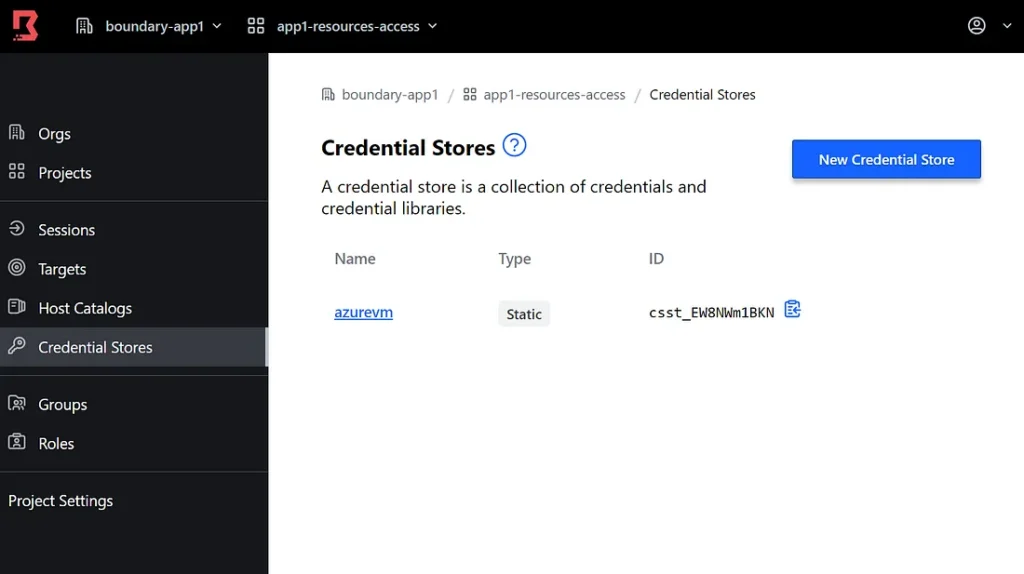
Step 5: Feel free to play with Users/Groups/Roles on the side blade. Here I am playing with admin user only. But obviously in prod you will have all the groups and users imported from Azure once SSO has been setup. Over there just the role assignments needs to be done. Anyways click on the project and you will see options like below.
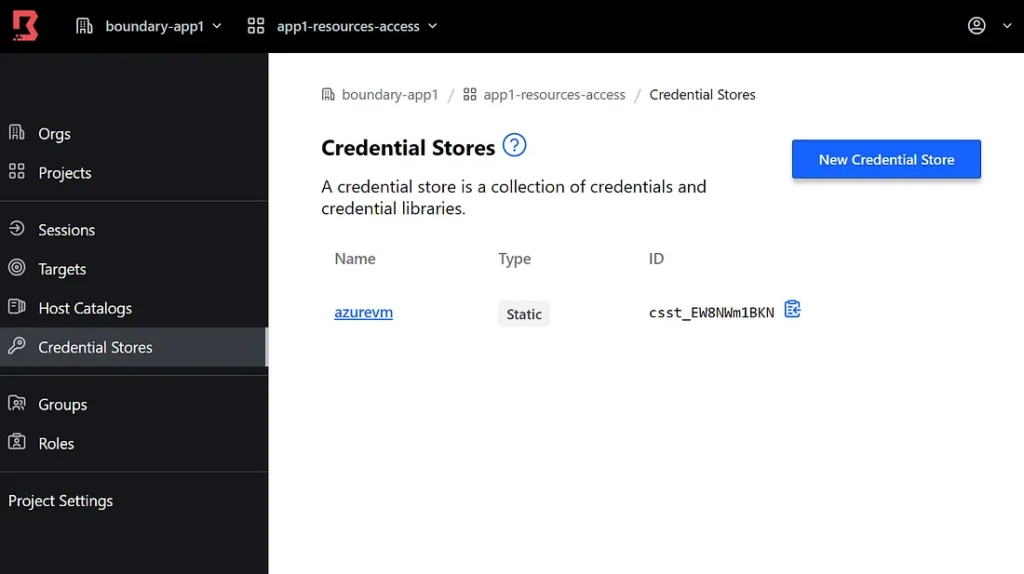
Like I said I don’t have HCP Vault so I have created Static Cred to be used later to login to a private resource.
Step 6: Create your Azure Resource in a Hub and Spoke network topology with two VM’s one which will sit in the HUB vnet and act as HCP worker to proxy connections to the Spoke resources. And the second one will be the VM with private IP in a private vnet in SPOKE which we will attempt to connect using HCP Boundary Client.
Here is the terraform code I used using Blackbox to save time — https://github.com/crazytechie1990/boundary-azure
Do an init and apply for this terraform and it will give you the required infra to do some hands-on.

Step 7: You know what, let’s use Boundary itself to connect to the VM in Hub as it is public and configure it as a worker so that it can then let us connect to private resource in Spoke (which in our case is the VM with private IP). So below screenshots highlight how once I have HCP Boundary GUI Client it prompted me to sign in.
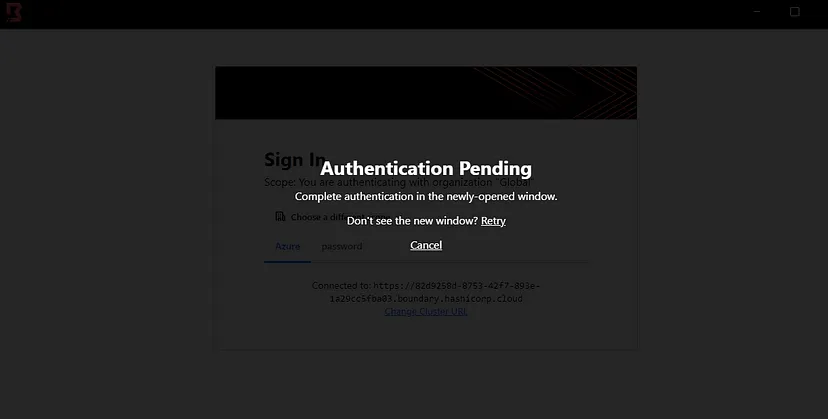
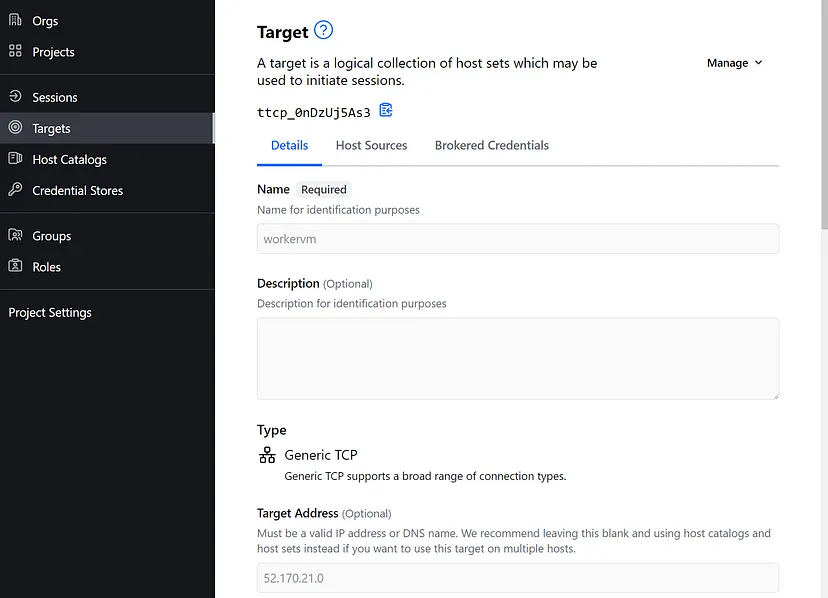
Once auth is done , go back to the admin gui and add the target, which in our case is the VM in HUB with public IP. I have my Worker machine as an Ubuntu machine so TCP port 22.I have named it worker vm. Heads up before we move on , below is the config we are attempting.
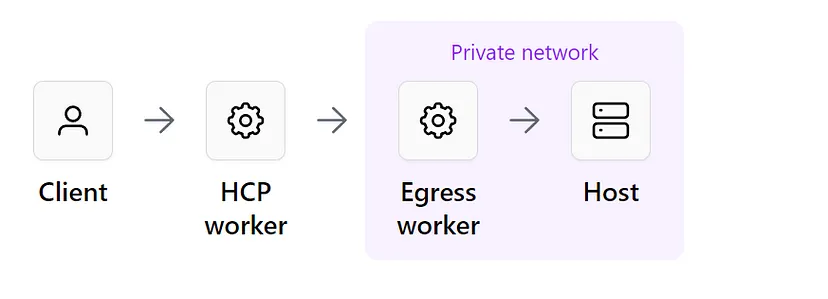
Step 8: Go back to the HCP Boundary Client and you should have a target now there named workervm. Just Click connect on it.
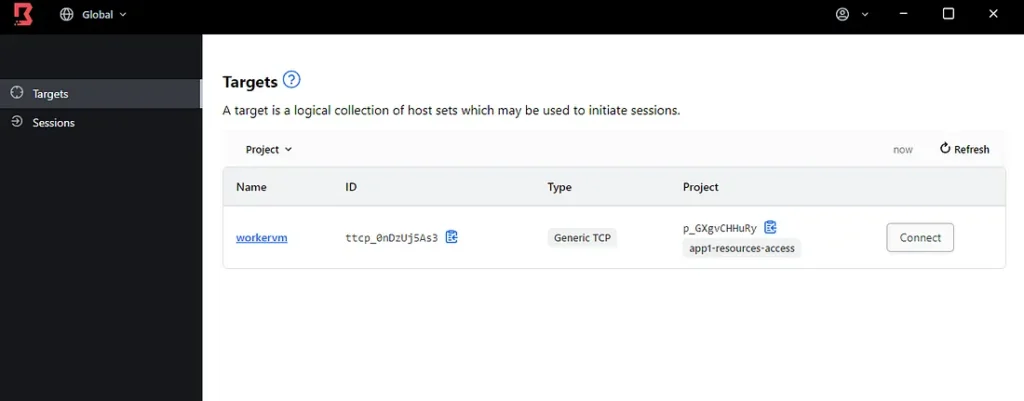
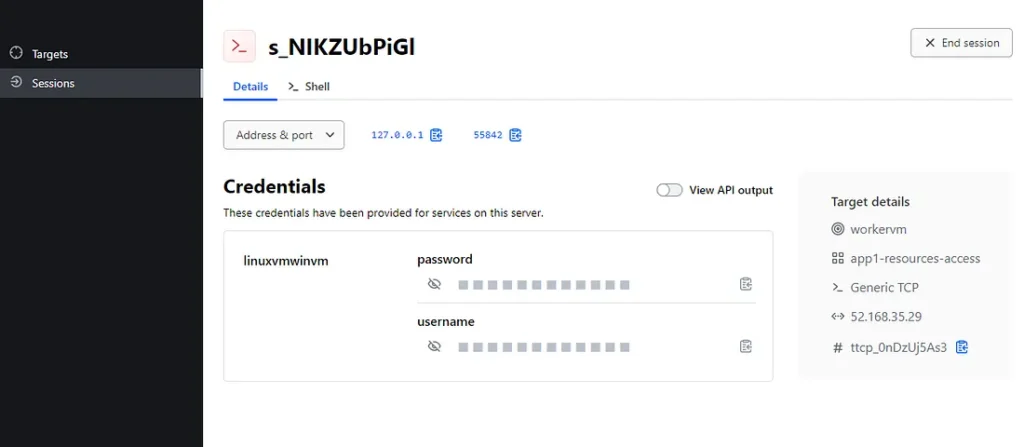
Here you go , so imagine if you are HCP admin and the team who are requested to configure workervm are different, they won’t even see the original IP. All they have now here is a loopback IP and a random port, with static credentials they can copy and login.
Step 8: Let’s connect to Shell and see if we can login to the VM. Do a ssh username@127.0.0.1 -p 55842. Enter password and you will have a shell login
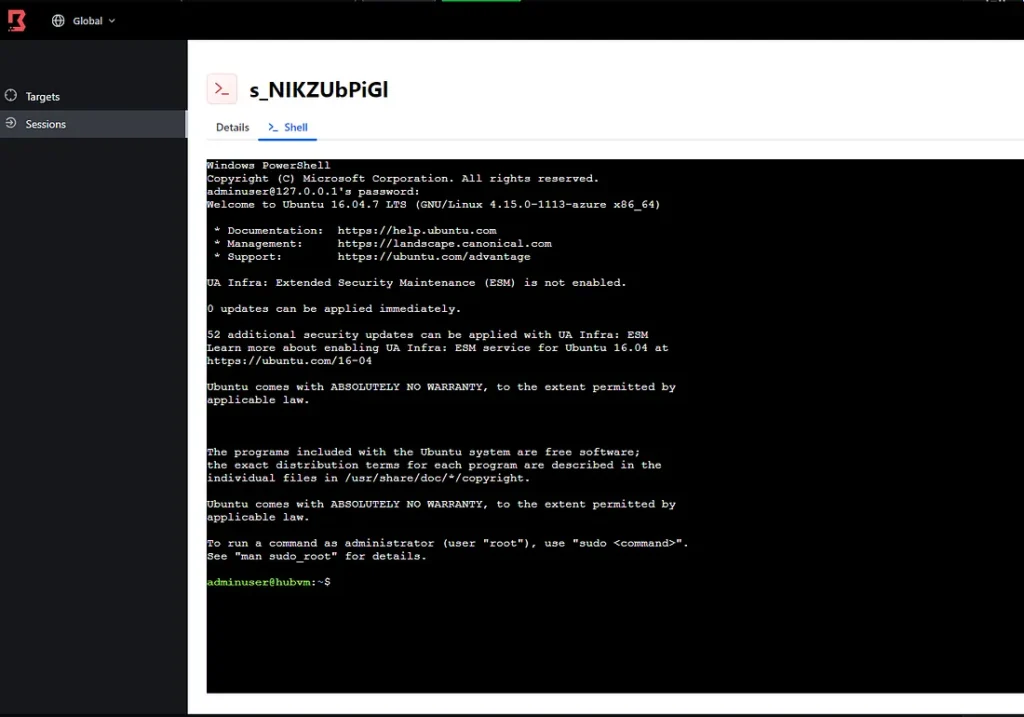
Step 8: Install Boundary on Ubuntu, build config and generate the Worker Auth.
Just follow the page here: https://developer.hashicorp.com/boundary/tutorials/hcp-administration/hcp-manage-workers
Below is my config and Auth if you fancy. (DON’T SHARE LIKE THIS IN PROD LOL )
disable_mlock = true

hcp_boundary_cluster_id = "82d9258d-8753-42f7-893e-1a29cc5fba03"

listener "tcp" {
  address = "0.0.0.0:9202"
  purpose = "proxy"
}

worker {
  public_addr = "52.168.35.29"
  auth_storage_path = "/home/adminuser/boundary/worker1"
  tags {
    type = ["worker1", "upstream"]
  }
}
adminuser@hubvm:~$ boundary server -config="/home/adminuser/boundary/pki-worker.hcl"
==> Boundary server configuration:
Cgo: disabled
Listener 1: tcp (addr: "0.0.0.0:9202", max_request_duration: "1m30s", purpose: "proxy")
Log Level: info
Mlock: supported: true, enabled: false
Version: Boundary v0.15.0+ent
Version Sha: 8370b8f0674a262a0c2f24f89e3178c329d34199
Worker Auth Current Key Id: submarine-harmonica-purveyor-those-distinct-impolite-charter-unmanaged
Worker Auth Registration Request: GzusqckarbczHoLGQ4UA25uSQx1aCMKNwYKx838ppaPQtqDcyGwVq2eZ5jDPBwdvhgjGeRytPu4SaQpqzvxmNhgT3KtF4Ycq35NQD2HgF39hd8G2BtuGEodnXC1ukjWhbG29XS8LpTxjAw1JZ6Y6CzdyM2d6oJAoPwnVJeRWyBWzkk4d3xZcC3hufavvMqejQErvPppY3B9Tu8FoYu1Kye1w9ETcFwT4mNcA4ENS635f75LTJvCgLLVGVRCsgNzWwRMbZCx73HfXRW1Hw68yWFFuJfzzLpXQQPXJomKJzf
Worker Auth Storage Path: /home/adminuser/boundary/worker1
Worker Public Proxy Addr: 52.168.35.29:9202
==> Boundary server started! Log data will stream in below:
{"id":"5YKID19lqz","source":"https://hashicorp.com/boundary/hubvm/worker","specversion":"1.0","type":"system","data":{"version":"v0.1","op":"worker.(Worker).StartControllerConnections","data":{"msg":"Setting HCP Boundary cluster address 82d9258d-8753-42f7-893e-1a29cc5fba03.proxy.boundary.hashicorp.cloud:9202 as upstream address"}},"datacontentype":"application/cloudevents","time":"2024-02-11T03:16:59.338710865Z"}
{"id":"FWxl7OvjTM","source":"https://hasStep 9: Now if you have the Auth with you like I have , then HCP Boundary Admin need to take it and add the worker to the HCP Cluster.
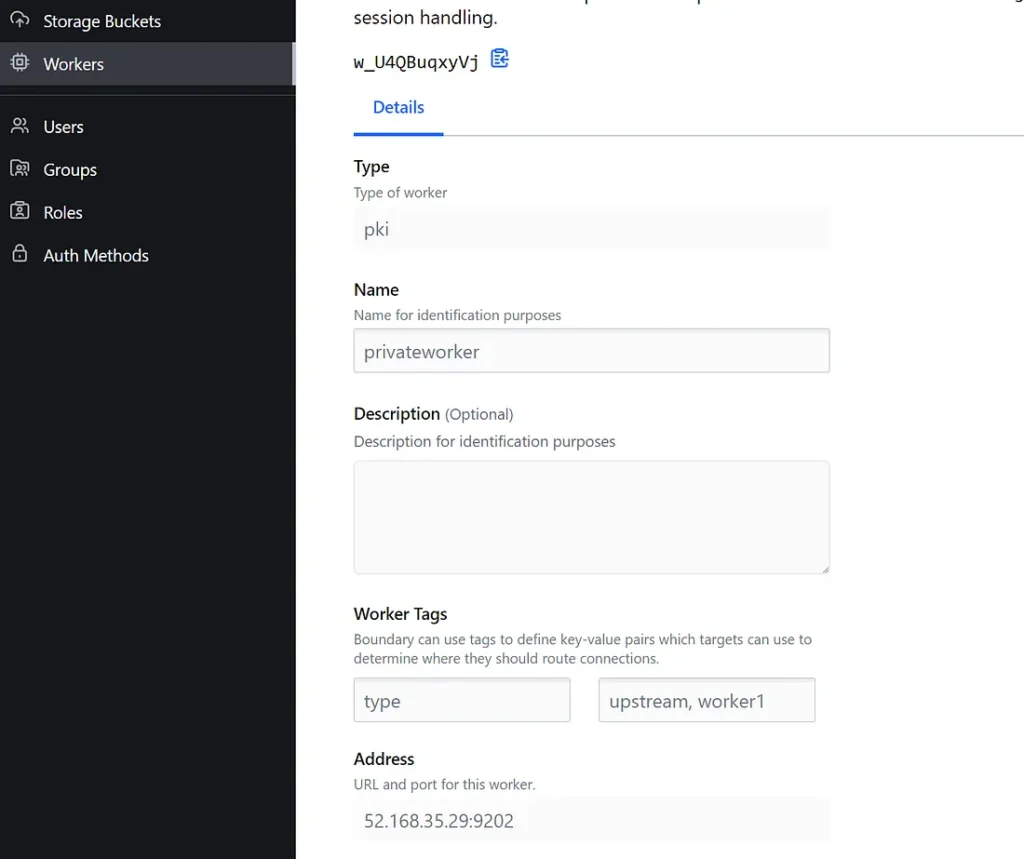
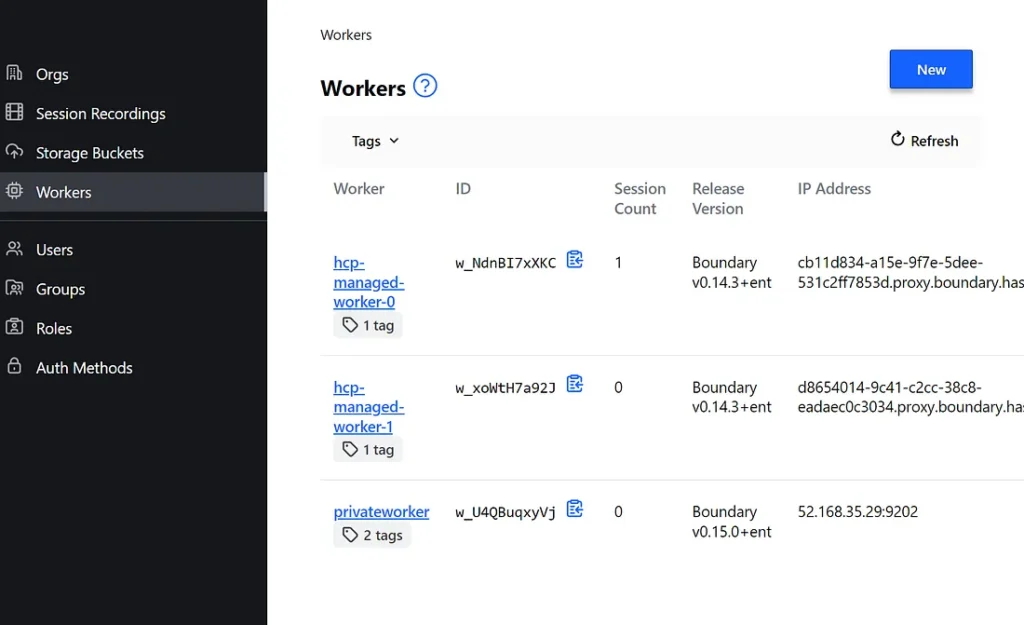
So now you have worker in your HUB in a vnet which can see any resource peered with the HUB vnet. Look, ofcourse in production you need to open a firewall for worker node, build nsg’s for subnets where worker VM will sit and need to chose a security hardened images etc. I am not gonna go much details on them but they are the standard practices. My aim here is to demonstrate the drawbacks of Bastions fixed by HCP Boundary and makes me feel secure when I allow someone access the private infra for troubleshooting/audit purposes. Also you can have more secured installation of Boundary using multi hop etc. But that is all to build more security if possible.
Step 10: Next I am gonna add our spoke VM which is only exposed using private IP in the spoke vnet and see if now Bastion can connect to that VM.
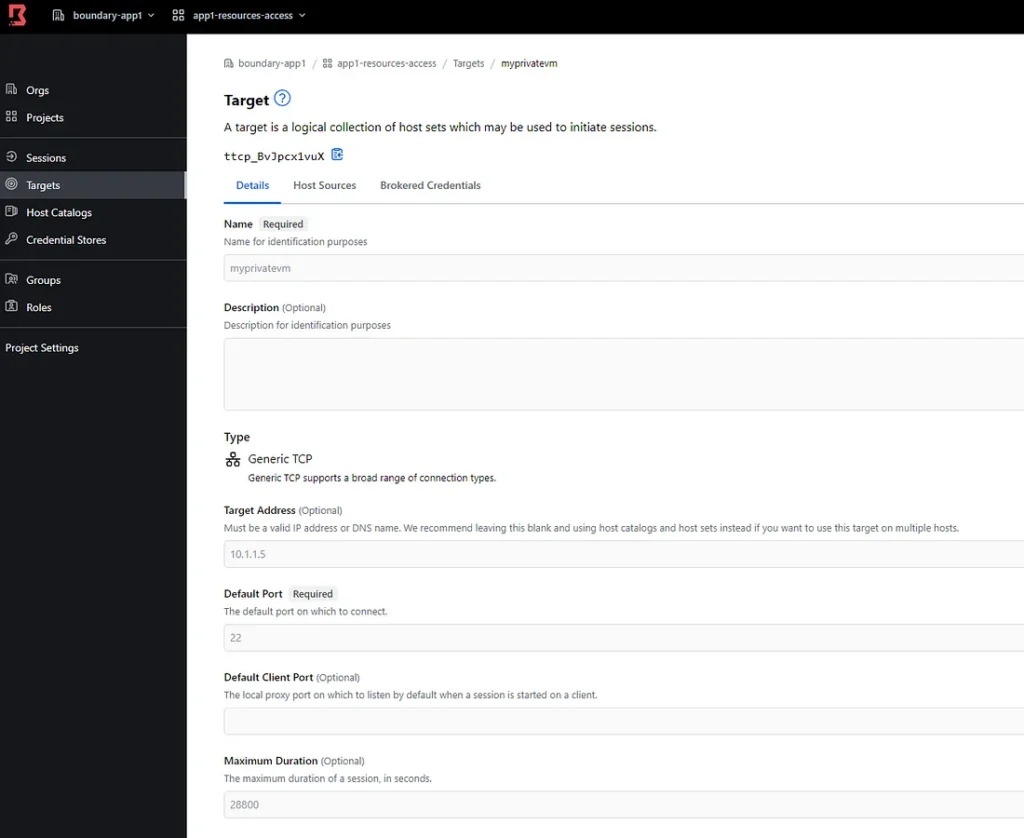
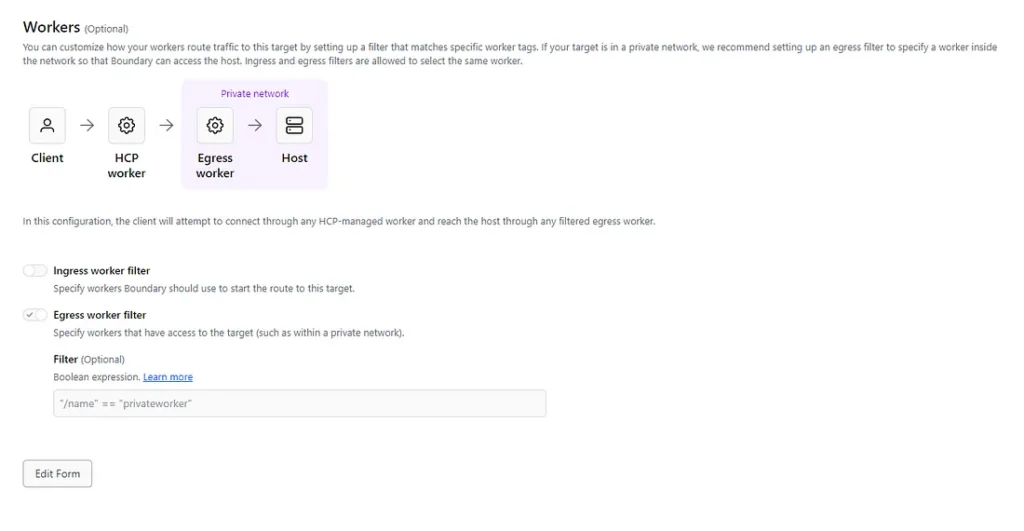
You need to use Filter to let the target know about that worker in HUB else the connection will fail
Step 11: Time to test if we can connect securely to a private resource in our Cloud Infra.
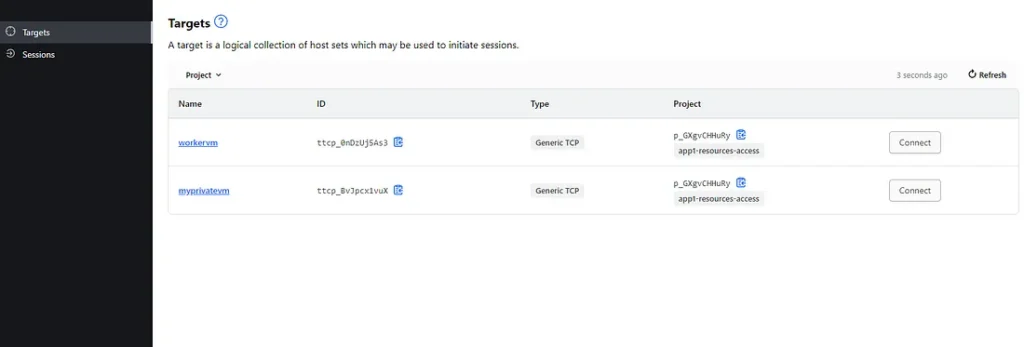
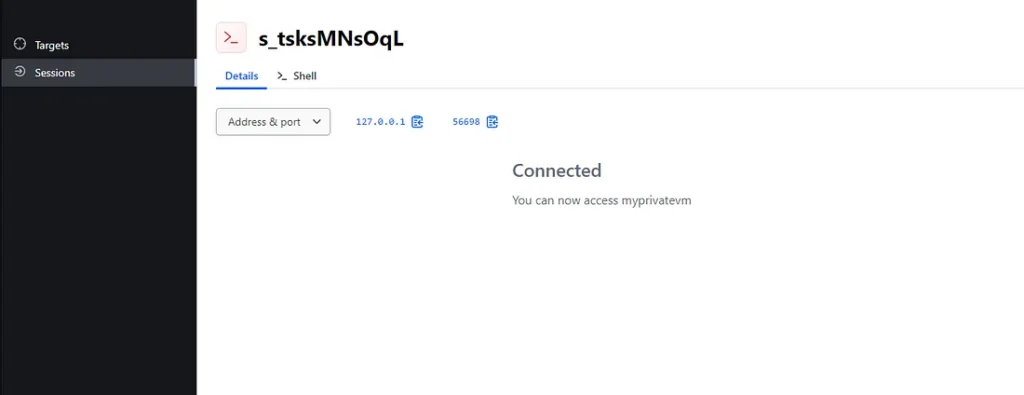
As we expected we are connected to it.
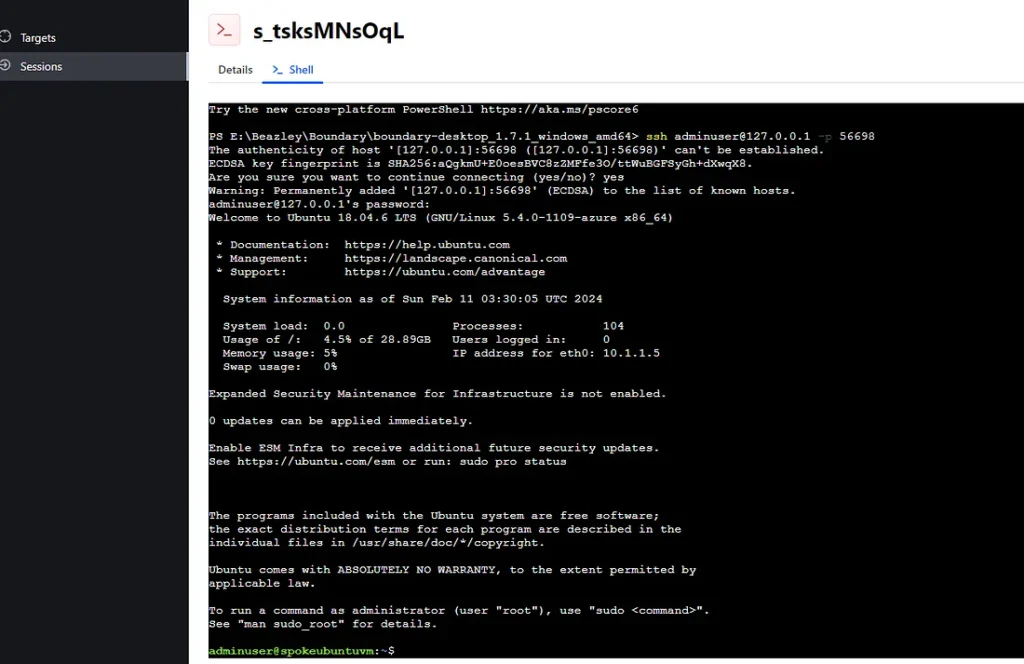
And using the loopback IP and randomly generated port we are logged in.
The Future of Secure Remote Access
As the landscape of remote work and cloud computing continues to evolve, tools like HashiCorp Boundary will play a pivotal role in ensuring that organizations can provide secure, efficient, and user-friendly access to their systems. By embracing Boundary, companies can not only enhance their security posture but also empower their teams with the flexibility and access they need to be productive, regardless of their location.
In conclusion, HashiCorp Boundary represents a significant leap forward in the realm of secure remote access. With its emphasis on security, minimal configuration, and user experience, Boundary is well-positioned to become an indispensable tool for organizations navigating the complexities of modern IT infrastructure.
Connect with me on LinkedIn : Sachin Bhardwaj


